



Updated 6 April 2021
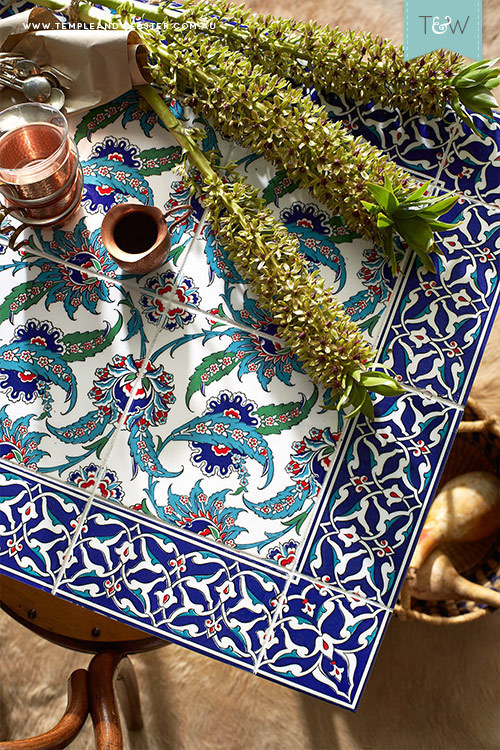
Our styling team is endlessly inventive about finding ways to show off the beautiful products we sell. When presented with these beautiful patterned Turkish tiles, stylist Emmaly Stewart (pictured below) rose to the challenge and created a gorgeous tabletop especially for our shoot. Here's how she did it…

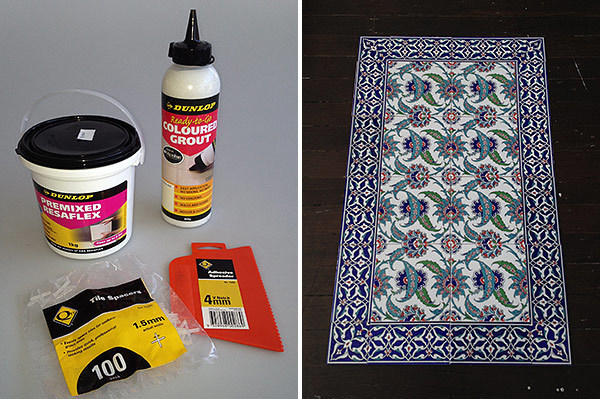
You'll need:
Premix Resaflex (adhesive)
Premix Coloured Grout
Tile Spacers
Plastic Cement Spreader with teeth
Sponge and dry cloth
Step 1 - Prepare
Lay the tiles out on a different surface (I chose the floor), matching the patterns up so they are ready to go. Clean any dust or dirt off the tiles, and the surface you're tiling.
Step 2 - Lay the tiles
Using the plastic cement comb, spread the premixed Resaflex onto the surface. Begin at one end, and spread only enough for a few rows of tiles, so you don't have to rush to lay the tiles before the adhesive dries.
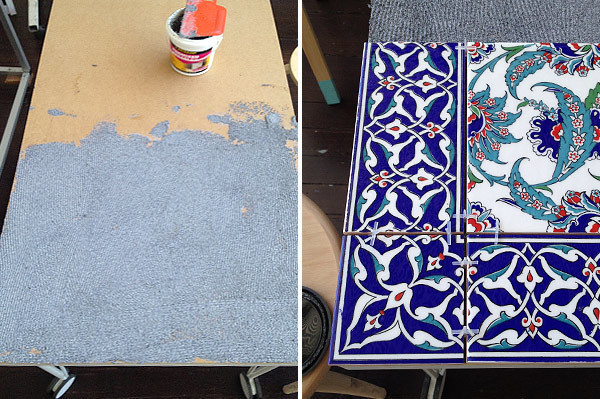
Beginning in one corner, start laying the tiles. Use tile spacers between each tile and between rows. Use 2 spacers on each side of the tiles to ensure they don't move around. Once you tile to the end of the adhesive, spread another amount for another 2 or 3 rows, then lay another set of tiles. Repeat this till you get to the end. As you're tiling keep in mind that the gaps need to line up so adjust as necessary while the adhesive is still wet. Once you finish tiling, wipe away any excess cement from the sides and leave for 24 hours.
Step 3 – Grouting
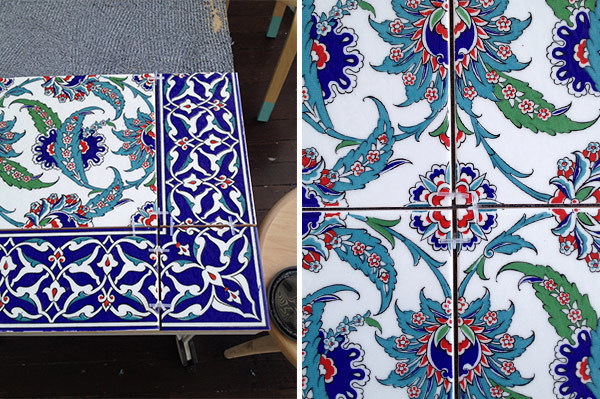
Choose a premixed grout in a colour to suit your tiles (I used a bright white). Have a bowl of water, a damp sponge and a dry cloth ready, and remove all the tile spacers. Cut the nozzle off the grout, attach the separate lid and shake the mixture upside down.
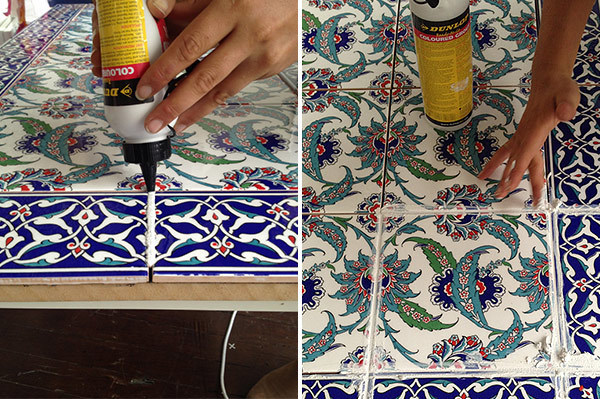
Keeping the tube on a 90 degree angle, squeeze grout into the gaps, making sure you are filling the holes. As you finish each row, use your finger to compact the grout into the gaps and move away any excess. You can also use a squeegee for this job but my finger did the trick. Every few rows, use the damp sponge to clean over the tiles and grout, rinsing it between each use, and the dry cloth to wipe off as much residue as possible. Once you're finished, go over the tiles with the dry cloth (avoiding the grout) to ensure they're clean.
Voila, your very own tiled table!
Tile your own table - with stylist Emmaly Stewart
Our styling team is endlessly inventive about finding ways to show off the beautiful products we sell. When presented with these beautiful patterned Turkish tiles, stylist Emmaly Stewart (pictured below) rose to the challenge and created a gorgeous tabletop especially for our shoot. Here's how she did it…
You'll need:
Premix Resaflex (adhesive)
Premix Coloured Grout
Tile Spacers
Plastic Cement Spreader with teeth
Sponge and dry cloth
Step 1 - Prepare
Lay the tiles out on a different surface (I chose the floor), matching the patterns up so they are ready to go. Clean any dust or dirt off the tiles, and the surface you're tiling.
Step 2 - Lay the tiles
Using the plastic cement comb, spread the premixed Resaflex onto the surface. Begin at one end, and spread only enough for a few rows of tiles, so you don't have to rush to lay the tiles before the adhesive dries.
Beginning in one corner, start laying the tiles. Use tile spacers between each tile and between rows. Use 2 spacers on each side of the tiles to ensure they don't move around. Once you tile to the end of the adhesive, spread another amount for another 2 or 3 rows, then lay another set of tiles. Repeat this till you get to the end. As you're tiling keep in mind that the gaps need to line up so adjust as necessary while the adhesive is still wet. Once you finish tiling, wipe away any excess cement from the sides and leave for 24 hours.
Step 3 – Grouting
Choose a premixed grout in a colour to suit your tiles (I used a bright white). Have a bowl of water, a damp sponge and a dry cloth ready, and remove all the tile spacers. Cut the nozzle off the grout, attach the separate lid and shake the mixture upside down.
Keeping the tube on a 90 degree angle, squeeze grout into the gaps, making sure you are filling the holes. As you finish each row, use your finger to compact the grout into the gaps and move away any excess. You can also use a squeegee for this job but my finger did the trick. Every few rows, use the damp sponge to clean over the tiles and grout, rinsing it between each use, and the dry cloth to wipe off as much residue as possible. Once you're finished, go over the tiles with the dry cloth (avoiding the grout) to ensure they're clean.
Voila, your very own tiled table!
Explore More








Head Office (No Showroom)
2/1-7 Unwins Bridge Rd, St Peters,
NSW 2044, Australia
Your customer reference #:
01-X-CSN